Walkthrough for Job Work
Job Work Walkthrough
-
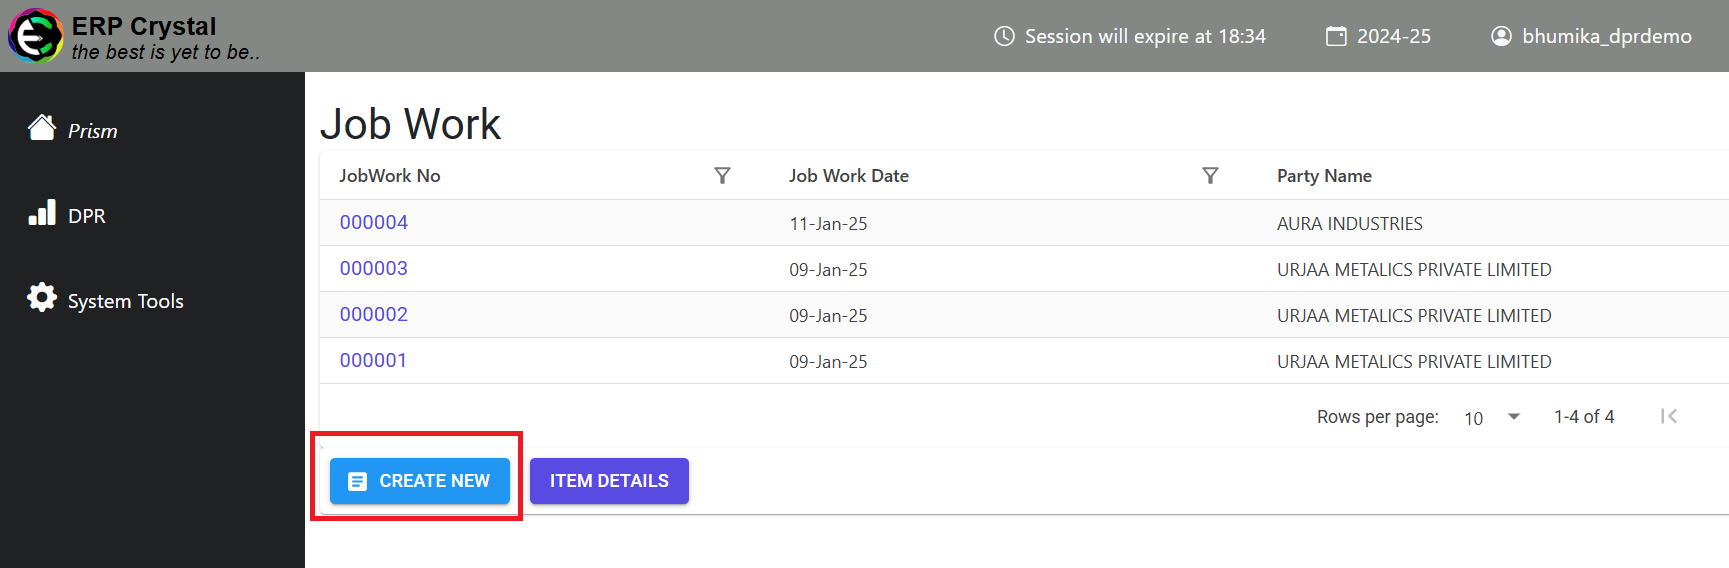
Accessing Job Work
- Navigate to the DPR menu and select Job Work.
- The Job Work index page will open, displaying a list of existing Job Works. This page offers options such as Create for initiating new Job Work entries and Item Details to view all items associated with a specific Job Work.
-
Creating a New Job Work
- Click on the Create New button and enter the necessary details for the Job Work.
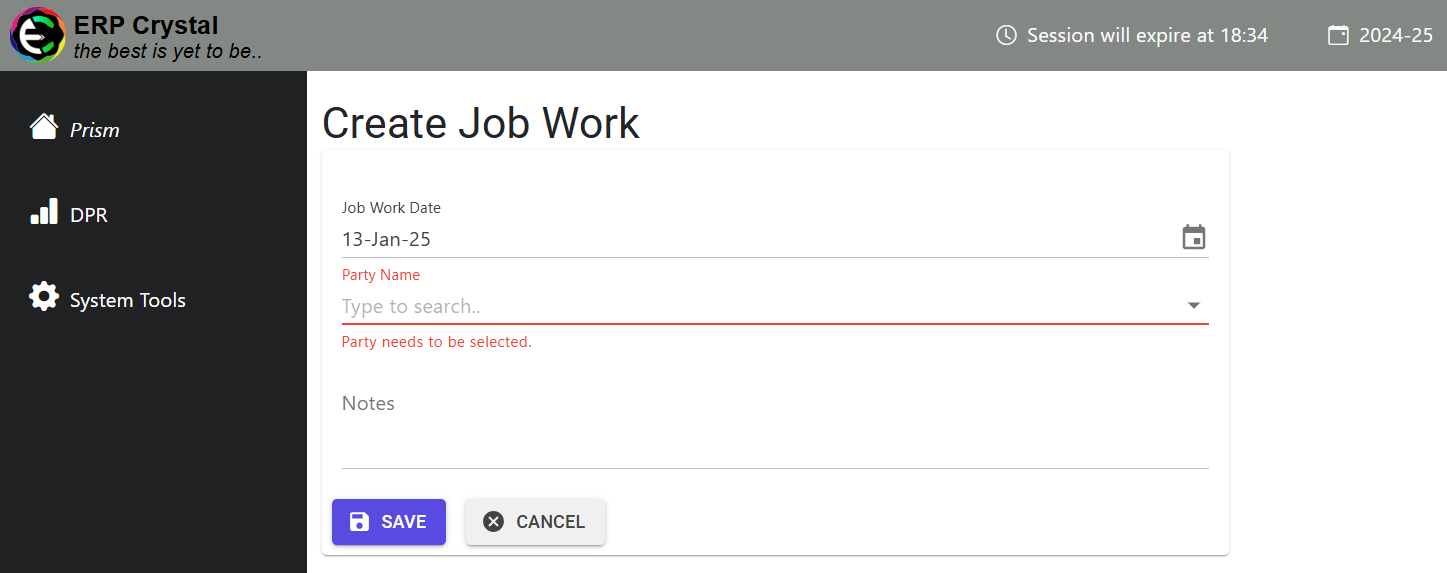
- Click on the Create New button and enter the necessary details for the Job Work.
-
Creating Job Work Lines
- Click on the Job Work Line Details option.
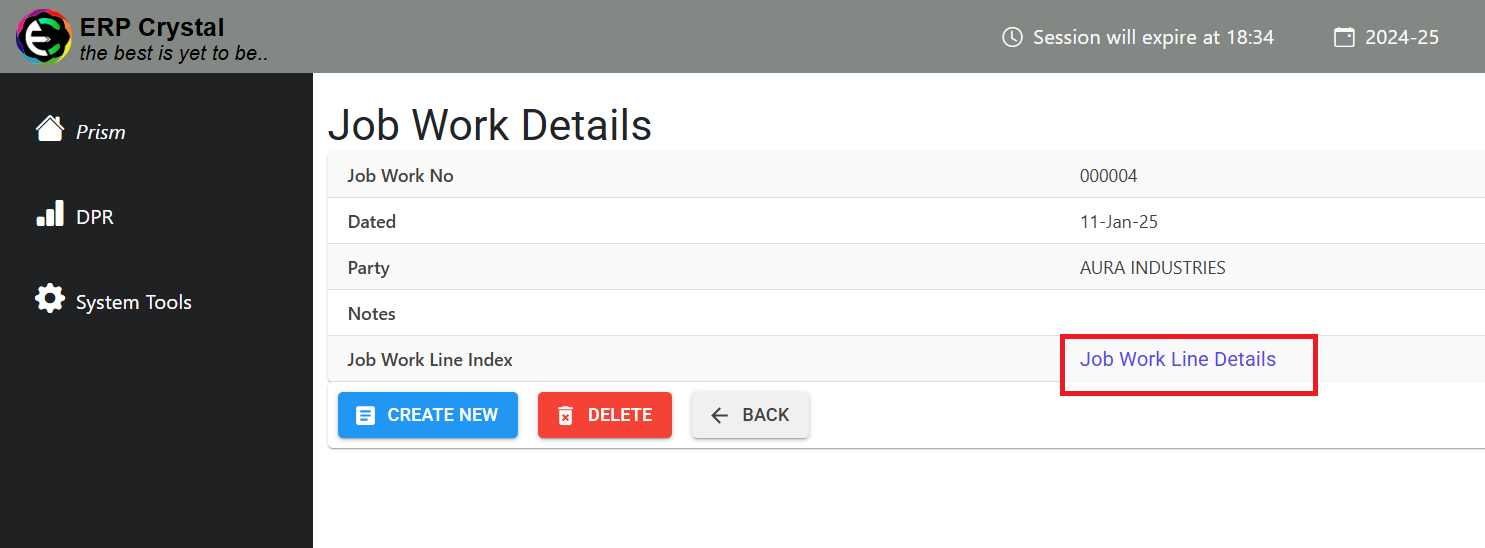
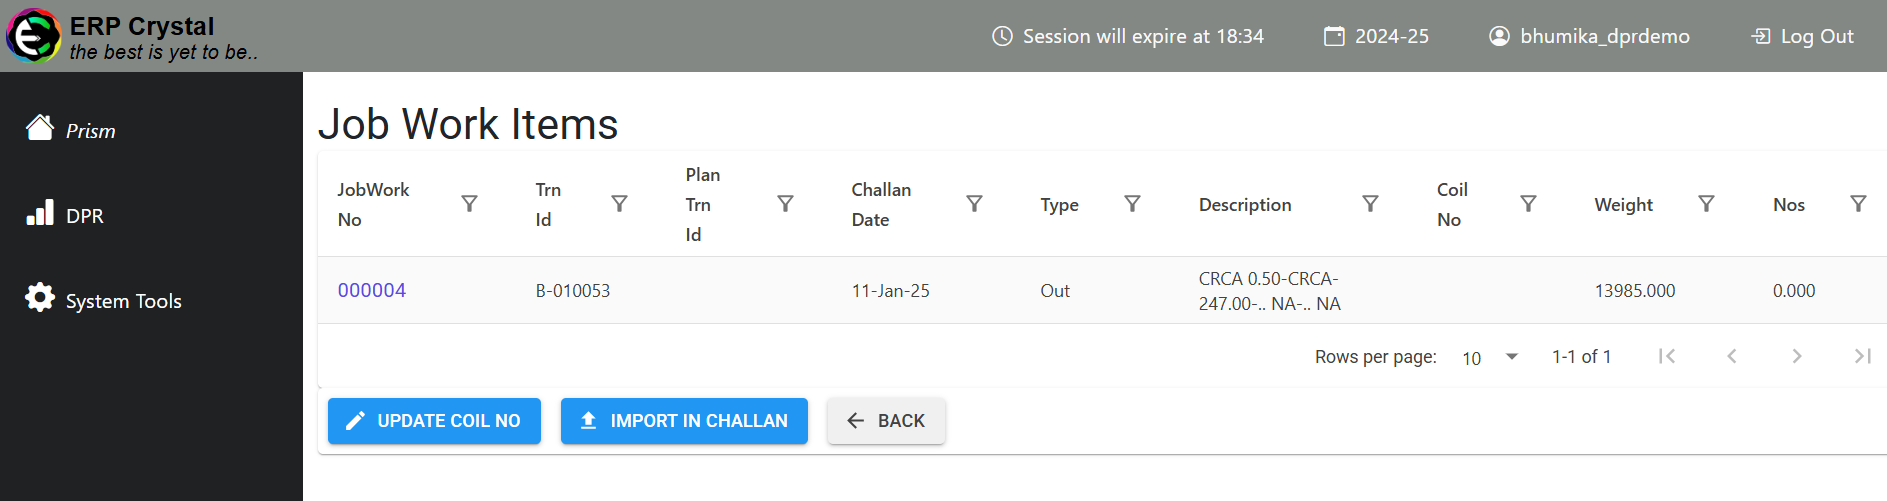
- This will redirect you to the Job Work Items Index. Click Import From Bill to begin importing the associated details.
- Click on the Job Work Line Details option.
-
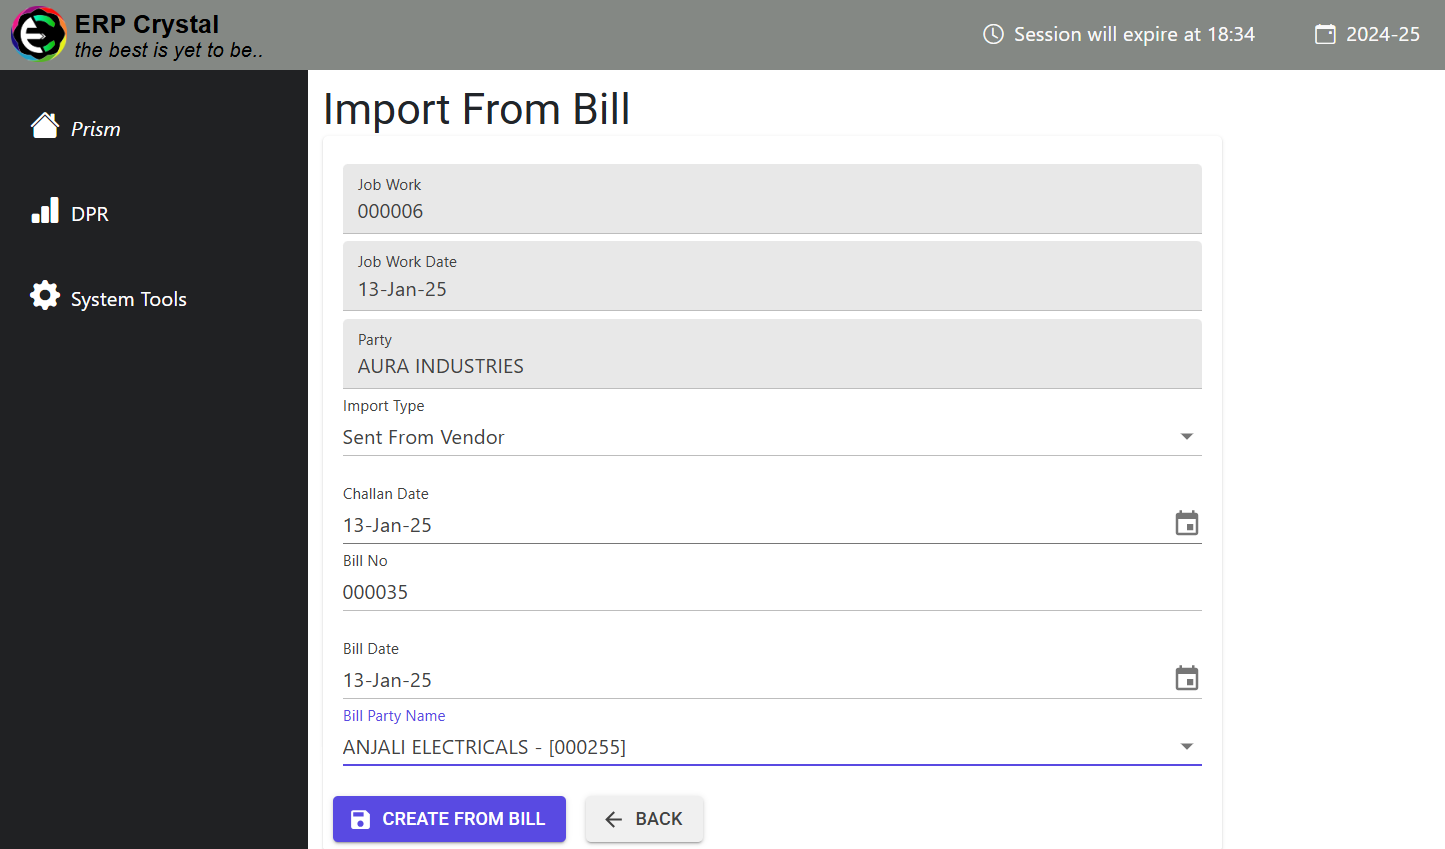
Importing from Bill (Sent From Vendor)
- The Import From Bill functionality offers two types of imports.
- Select Sent From Vendor to import data from a single Bill.
- Enter the Bill Date and Bill Party as per the provided Bill Number.
- Specify the Challan Date as required, ensuring that it is later than the Job Work Date.
- Click Create From Bill to complete the import process.
-
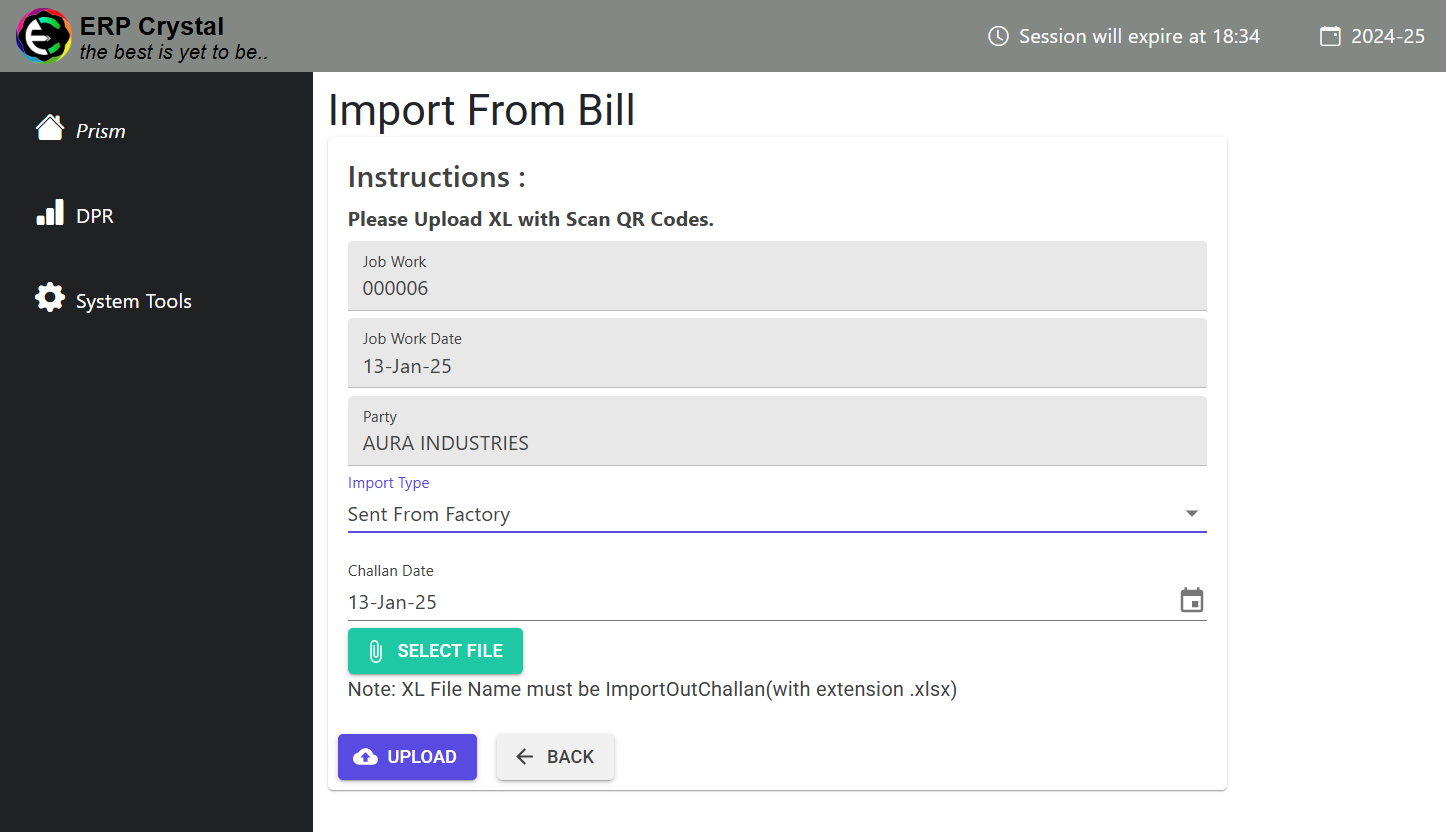
Importing from Bill (Sent From Factory)
- Select Sent From Factory to import from multiple Bills.
- Scan the QR Codes and upload the populated Excel file.
- Specify the Challan Date as required, ensuring it is greater than the Job Work Date.
- Click Upload to proceed with the import.
-
Uploading Coil Numbers
- Once the records are imported, click on Update Coil No.
- Download the provided model, fill in the Coil Numbers, and upload the updated file.

- Once the records are imported, click on Update Coil No.
-
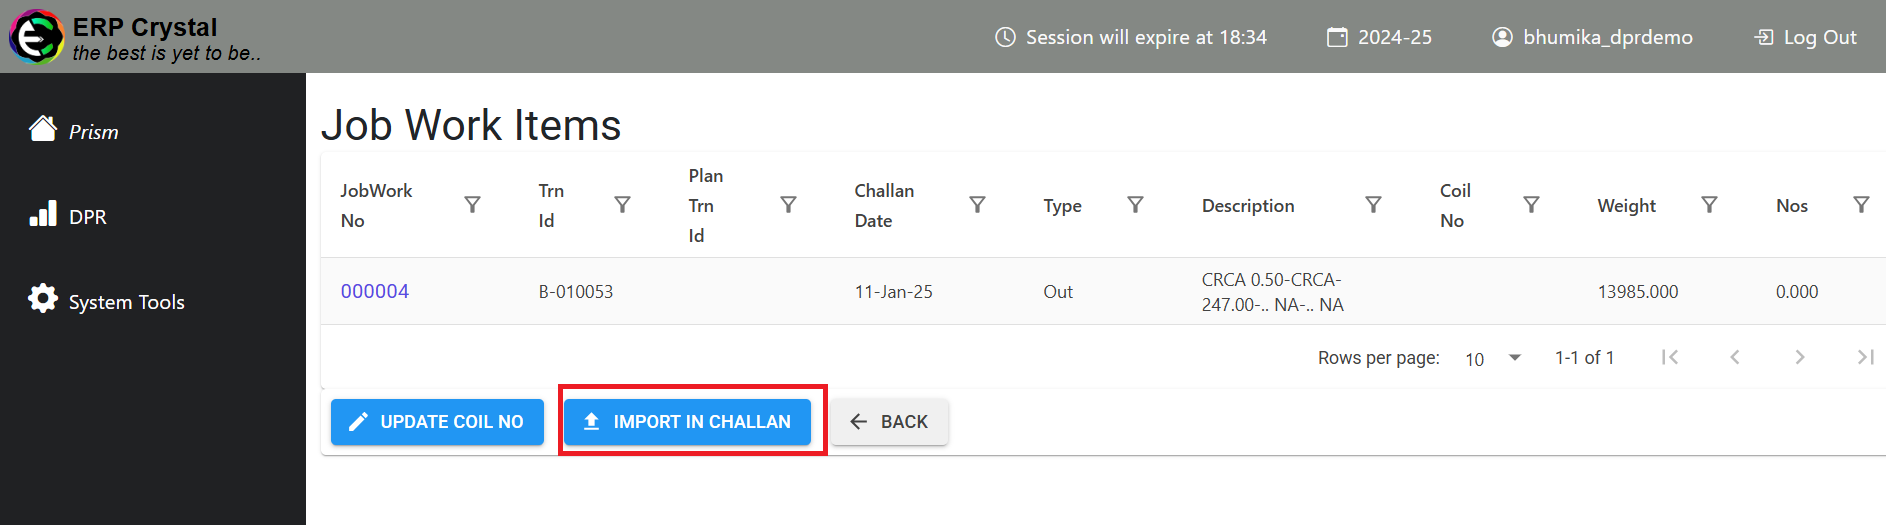
Importing into Challan
- After updating the Coil Numbers, click Import In Challan to proceed.
- Download the model, fill in the quantities, and import the data.
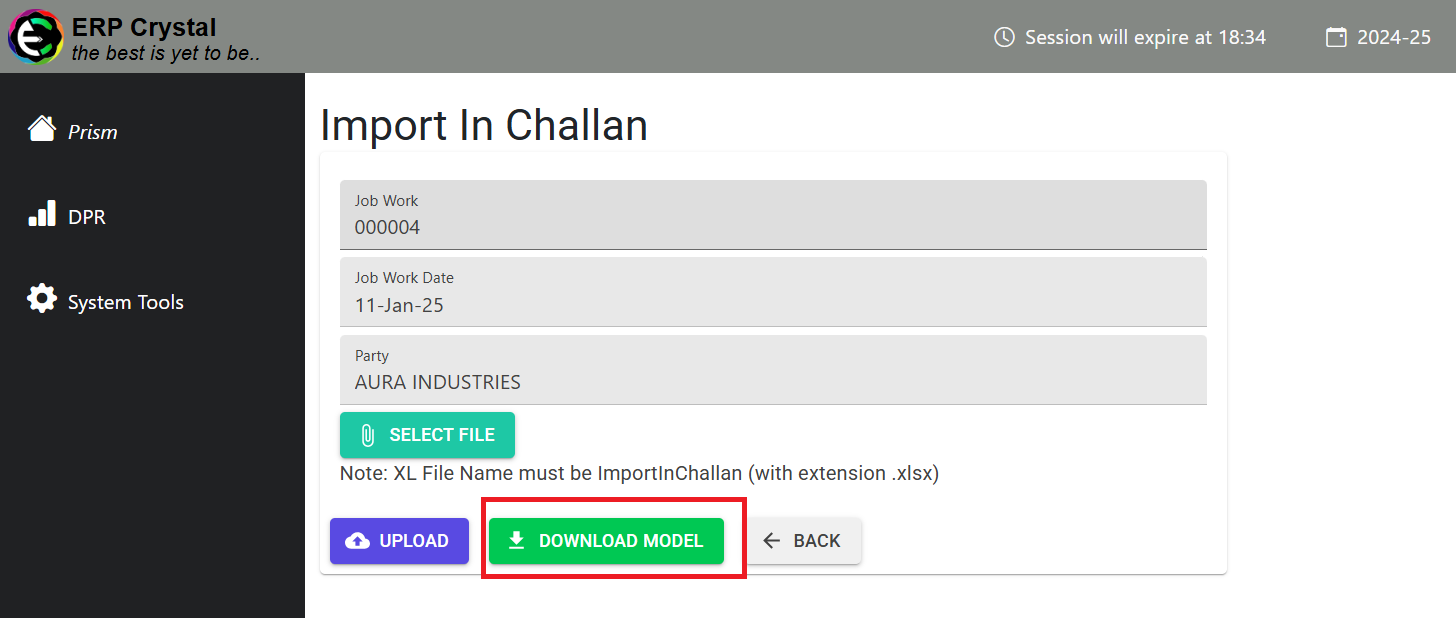
- Ensure that the corresponding plan has been created for the respective Bills in the Production Plan.
- After updating the Coil Numbers, click Import In Challan to proceed.
-
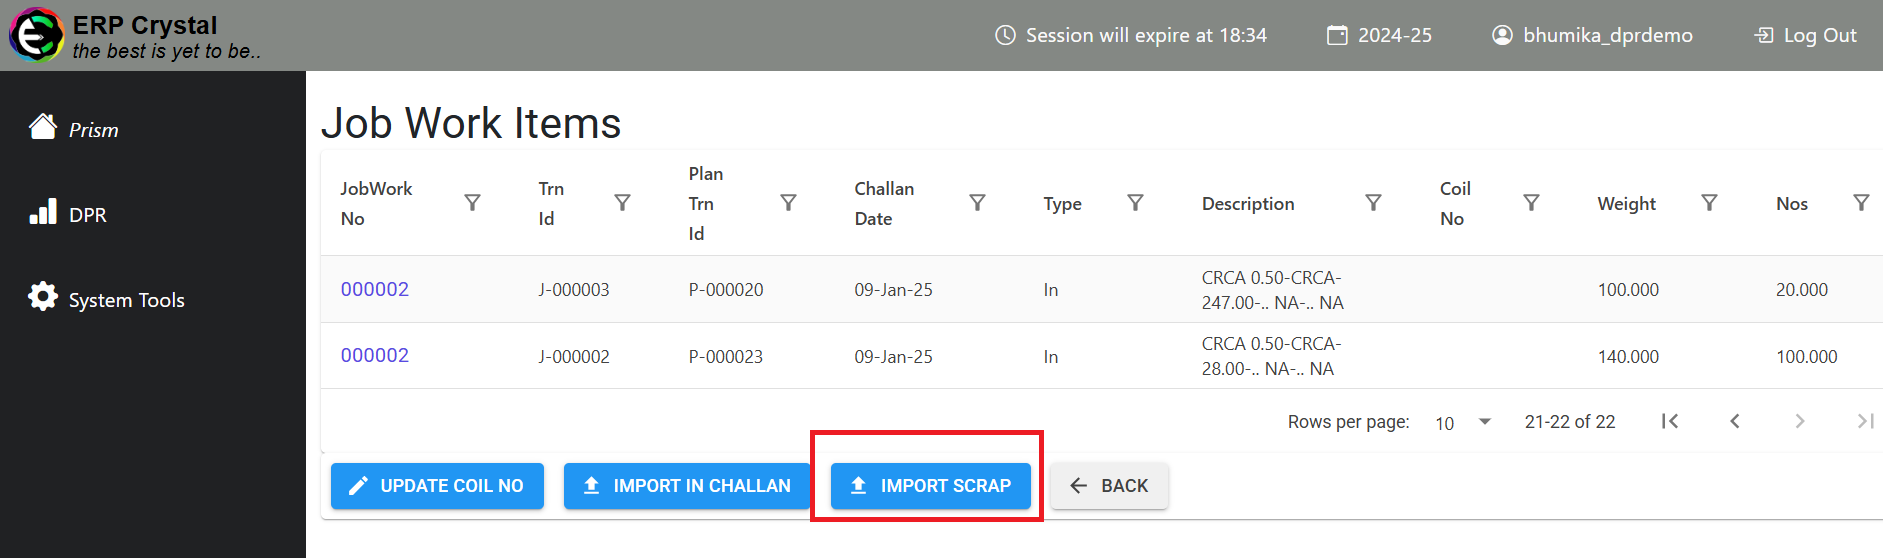
Importing Scrap
- Once the Challan is created, click Import Scrap.
- Download the model, fill in the quantities, and import the data.
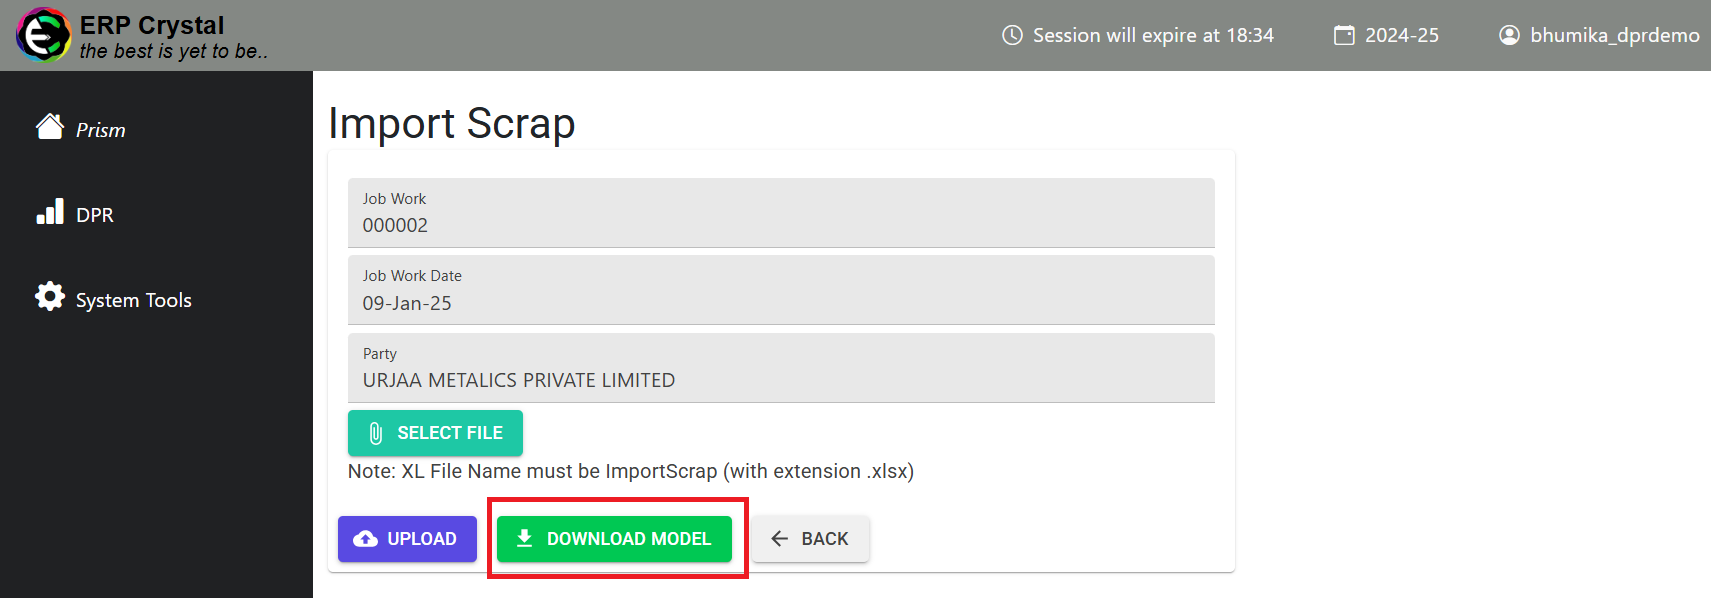
- Once the Challan is created, click Import Scrap.
-
Creating an Invoice
- To create an invoice for the In Challan, click on the record and select Create Invoice.
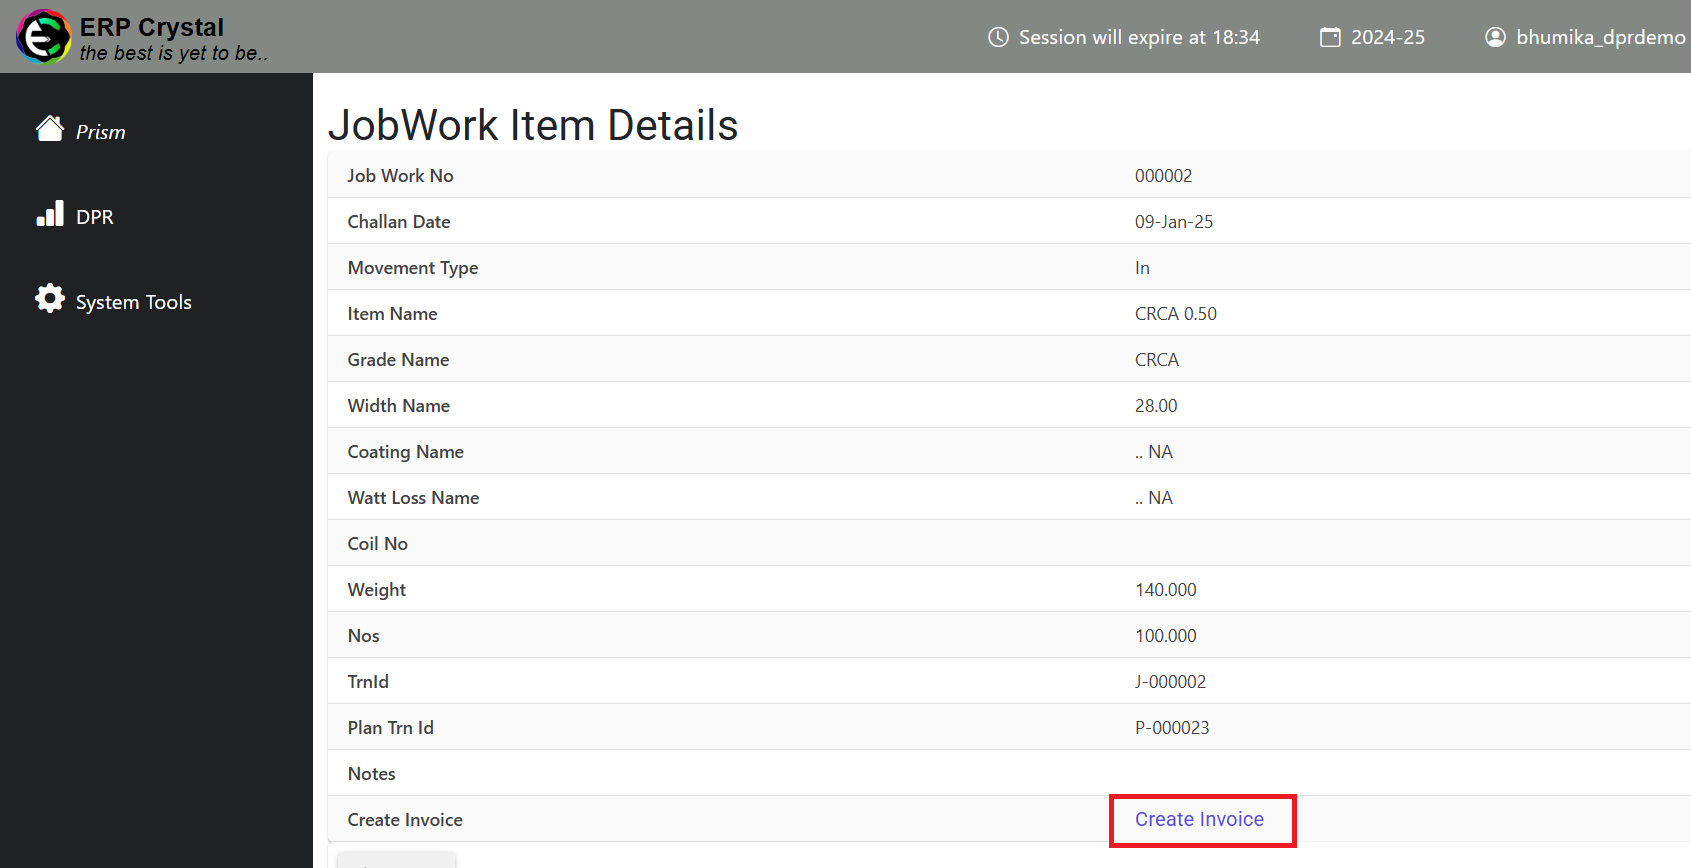
- Confirm the action, and the invoice will be generated.

- To create an invoice for the In Challan, click on the record and select Create Invoice.